Content
Brief backgroundStarting LARA server
Authentication system
API system
Serialization system
Packet system
Lara Framework
Authentication system
In order for users to be able to authenticate in the app, an authentication system must be activated. For this purpose, the "IAuthentication" interface should be implemented.
The internal authentication system of Lara framework uses this interface to connect to data source.
In general, there are 2 ways to activate Lara Authentication system:
1- Activating the internal implementation of IAuthentication interface, that utilizes file system for storing authentication data.
2- Custom implementation of IAuthentication interface.
The code of IAuthentication interface looks like this:
Internal implementation of IAuthentication interface
The simplest and the fastest authentication solution to implement, that can be activated through a single line of code, like the example below:
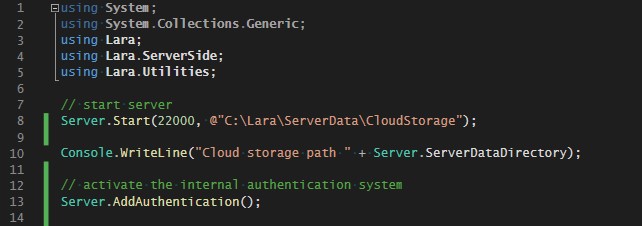
When activated, the user authentication data will be saved as xml files in the path ".../ServerData/users/[x]/[y]/account/".
in this path three files will be created upon creation of a new user account ("auth.xml" , "cred.xml" and "profile.xml").
If needed, migration of these files into another data form can be easily implemented through an external app.
Custom implementation of IAuthentication interface
In some cases, a database system is required. To connect to database, a custom implementation of IAuthentication interface is a must.
Once implemented you will rarely need to touch the code again. It is therefore highly recommended to implement this interface at the beginning of the development process.
Here we go through an example of adding a custom authentication system using a simple in-memory database.
First, we create a sample data source class to hold accounts data.
Notice:
The DataSource class shown above is not thread safe and is not meant to be as such, since it was only used for demonstration purposes.
For use in a real-life situation a synchronization system should be implemented. The use of real RDBMS like MySQL, SQL-Server or SQLite is highly recommended.
As we can see, the method "AddAccount" can be used to add new accounts to the already existing hard coded ones, and we will see in the next steps how to achieve that.
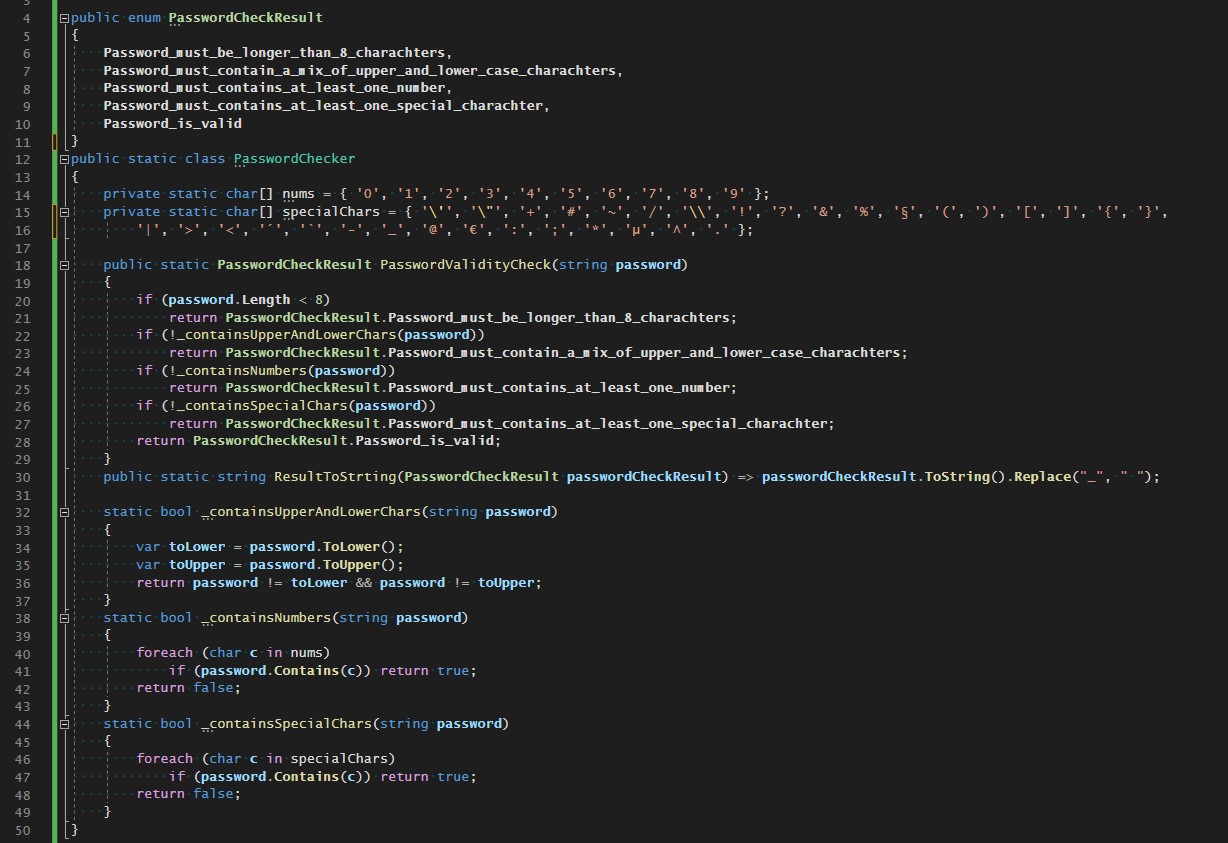
The next step is to create a class that implements our password checking logic.
This logic can be modified according to the requirements of the project.
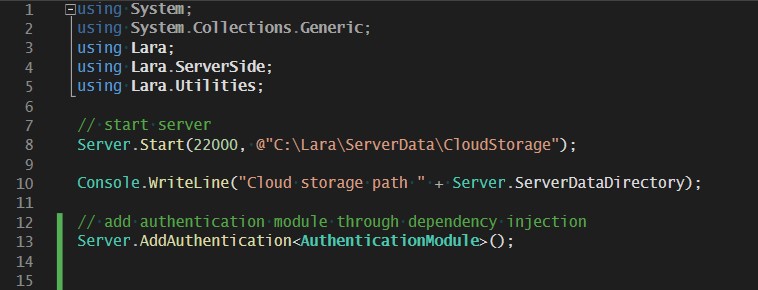
Now we create the implementation for our authentication system.
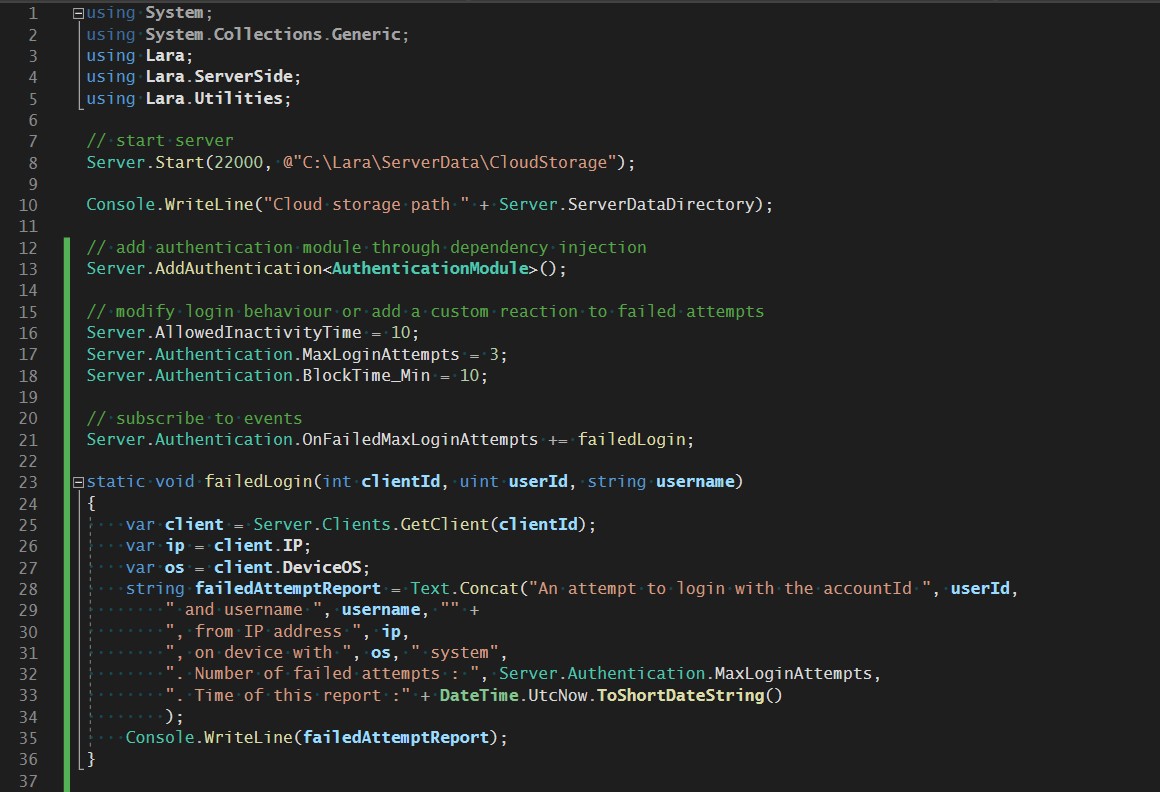
Then we add our implementation to the server through dependency injection.
In "Server.Authentication" there are two properties we can change for further modification of the login behavior or for sake of adding a custom reaction to failed login attempts.
Client side code
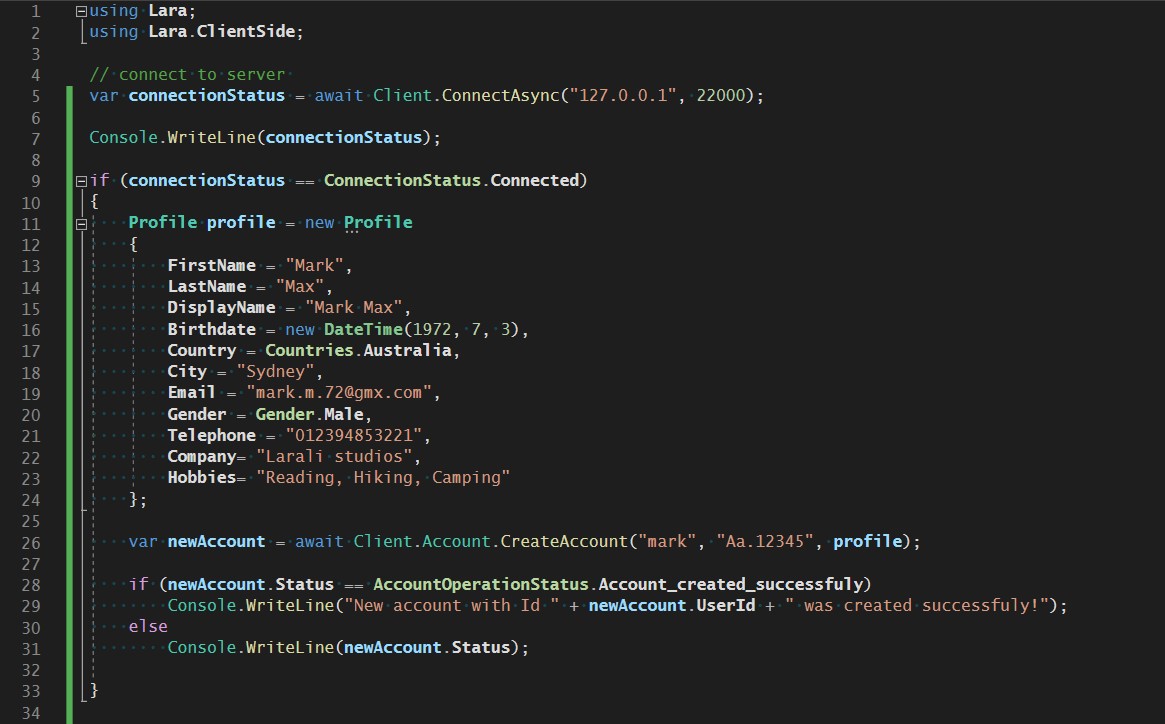
An example of creating a new account:
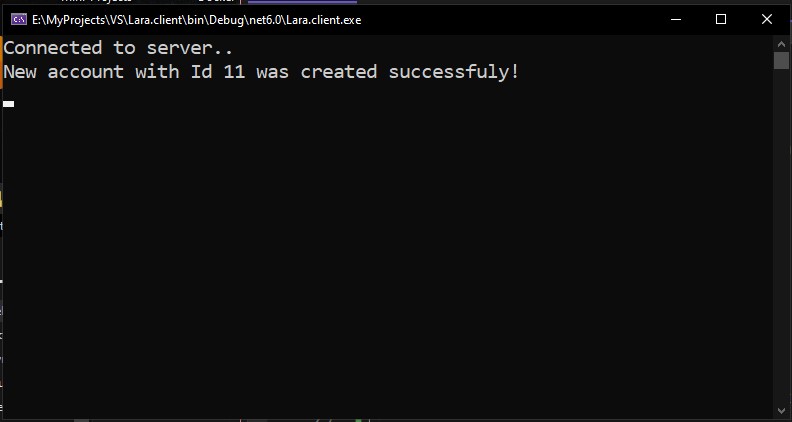
We get this output in console:
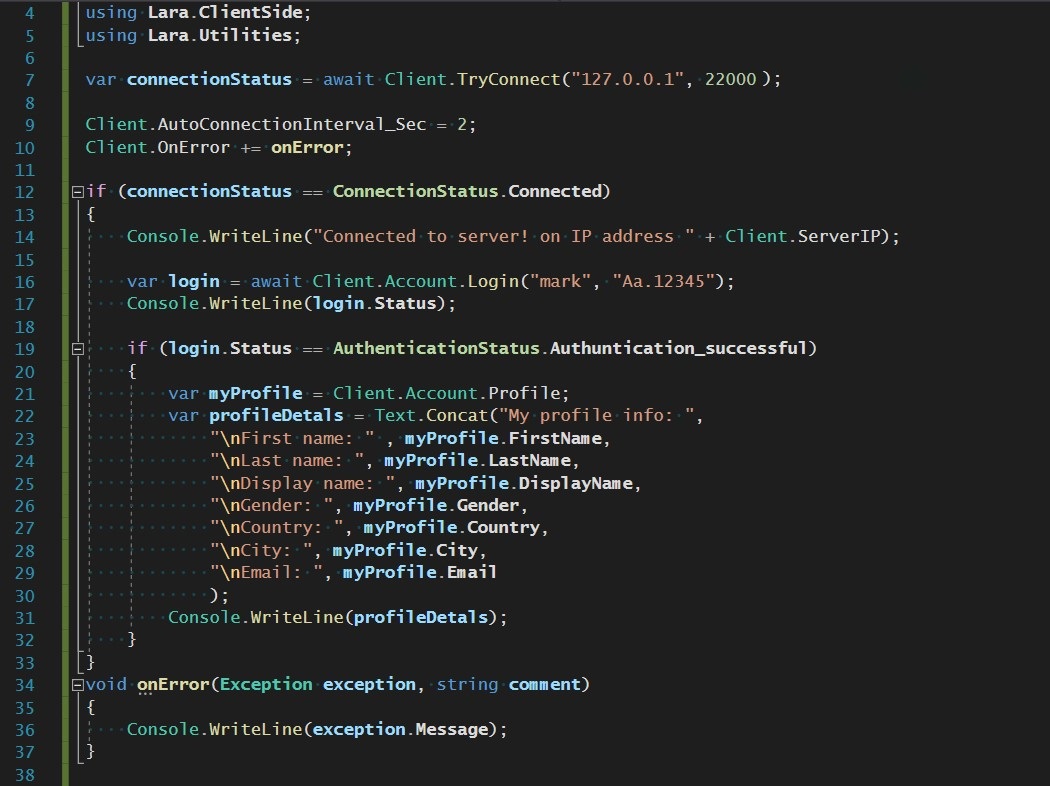
Now we login with the new account:
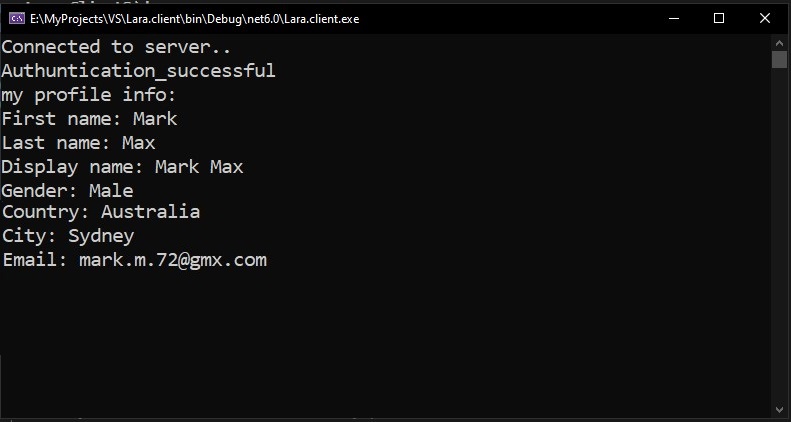
We get this output in console:
Back to starting LARA server
Got to API system